There’s a classic cynic’s answer to the question of “What is the cloud?” — “It’s just someone else’s computer that you rent.” And you know what, aside from a few minor details, it’s not wrong.
I eagerly await explanations about how this is not in fact correct in the comments section.
Well, the renting part is certainly true enough. Although Terra itself is free and open to all, you do have to pay for any actual work that you request from the underlying cloud service provider, which is currently Google Cloud Platform (GCP) (we’re working with Microsoft to add support for Azure).
The good news is that you can get free credits to try out GCP and Terra, and see if this all works for you, without paying anything out of pocket. Let’s go over the key steps involved in setting up your free trial with GCP and using the credits to do work in Terra.
Get free cloud credits from Google Cloud
GCP’s free trial program currently provides $300 worth of free credits to new users to spend over a period of 90 days. You can use the free credits to cover any GCP services, whether you use GCP’s web interfaces or you go through Terra, with a few usage limitations.
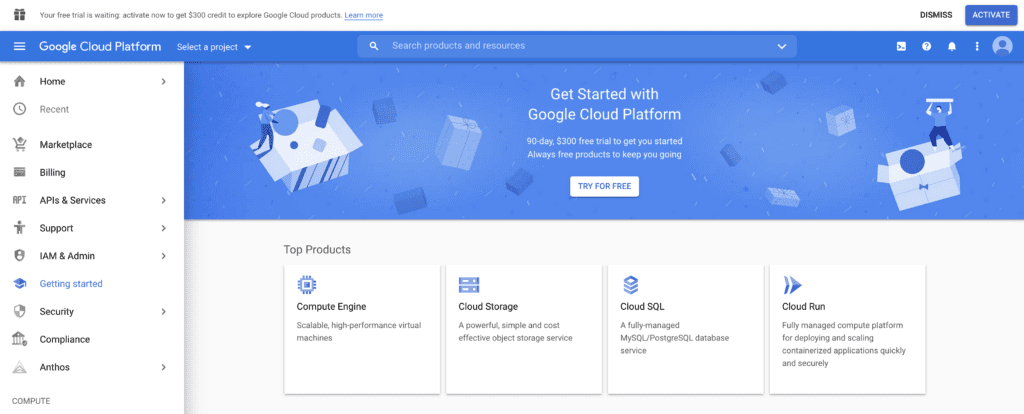
It’s all fairly straightforward to set up. You go to the GCP Console to sign up for the free trial (at this stage both “Activate” and “Try for free” go to the same signup form), then follow the instructions to set up a billing account. This requires that you provide either a credit card, a PayPal account or a bank account (which can take a few days to clear).
As explained in the GCP free credits documentation, the billing information is essentially a proxy for an identity check and is necessary to limit abuse; for example, to prevent people from creating multiple free trial accounts to mine bitcoin. And yes, some people will absolutely try to do that. When Terra first launched, we offered free credits without requiring any banking information in order to maximize access, but we eventually had to discontinue the program due to repeated abuse by hordes of bitcoin miners. Boo.
Rest assured however that GCP guarantees they will not charge your account automatically for anything when your free trial ends. You’ll have the opportunity to upgrade your account by expressly allowing GCP to charge your account, but if you don’t do it, your account will automatically be downgraded to access only their Free Tier services. Note, that does mean you’ll lose access to any data you might have stored under that account, so it’s worth planning ahead for what you’re going to do when your trial ends.
Finally, there is one thing that’s not super clear in this process and occasionally trips people up: the billing account setup doesn’t actually activate your free trial! So make sure you activate it, either by hitting “Activate” in the banner at the top of any console page, or “Upgrade” in the “Promotional credits” panel of the Billing dashboard. Even though the “upgrade” language makes it sound like you’re flipping the switch to allow GCP to bill you, that’s not the case; you’re just “upgrading” to GCP’s paid services using the free credits for payment.
Use your free cloud credits in Terra
At this point you’re all set to use GCP services through their console, but if you’re on this blog you probably want to use them through Terra, yes? Yes!
To do that, you need to give Terra permission to use your GCP billing account. Think of Terra as your butler — when you give her some errands to run, she needs to be able to give the dry cleaner your billing info so they can invoice you for getting that pesky mustard stain out of your favorite blouse. So, from the GCP Billing dashboard, you’ll go to the “Account management” page, where you’ll be able to add “terra-billing@terra.bio” as a Billing Account User.
If you have any trouble navigating this part of the GCP console, you can find step-by-step instructions in the Terra billing doc, under “Link Terra to your Billing Account on GCP console”.
With that set up on the GCP side, you’ll head over to the Terra Billing dashboard to create a billing project linked to your GCP billing account. If the previous step worked correctly AND you are logged in with the same Google identity, your GCP billing account will show up automatically in the dropdown menu. Pick a unique name for your Terra billing project and you’re off to the races.

Once you’ve created your billing project, you’ll be able start cloning or creating workspaces, launching workflows and cloud environments, and generally do work in Terra using those lovely free credits. Woohoo!
You’ll see your new Terra billing project up in your GCP Billing dashboard, and that’s where you’ll be able to track your spending, set budget alerts and so on. To learn more about billing and costs, start here.
How much work you can do with those $300 is a story for another time, but in my experience it’s more than enough to work through the Quickstart tutorials plus a good selection of the pre-loaded workspaces that are available in the Terra Showcase. Some researchers have even reported covering the majority of a medium-size exome analysis project with the free credits.
Anyway, I hope that helps you get started. If you run into any trouble or have questions about topics that I didn’t cover here, don’t hesitate to reach out to the Terra Helpdesk. I’d also love to hear from you about what you’d like to read next on this blog: setting up and managing your Terra account within an organizational context, or predicting, tracking and controlling computing costs. Let me know in the comments below!