John Bates is a software engineer at Verily. In this guest blog post, he and his fellow software engineer Nicole Deflaux share two solutions they developed for running Jupyter notebooks programmatically in support of their own analysis work.
Our team makes extensive use of Jupyter Notebooks for developing new analyses, because they enable us to iterate very quickly and collaboratively in an interactive environment.
However, we have found there are certain situations where we want to run a notebook programmatically — meaning, just launch the entire analysis with a single command, without having to manually open the notebook and run cells.
- To run a notebook with a known, clean virtual machine configuration to confirm it has no unresolved dependencies on locally installed Python packages, R packages, or on local files.
- To run a notebook with many different sets of parameters, all in parallel.
- To execute a long-running notebook (e.g., taking hours or even days) on a machine separate from where you are working interactively.
- To automate an analysis that was developed in a notebook without porting it to a workflow.
Fortunately, there is a command-line tool called Papermill that makes it possible to parameterize and execute Jupyter Notebooks programmatically. So all you really need to achieve these goals from within Terra is to devise a way to launch the Papermill command on a clean virtual machine.
We recently developed a pair of approaches to do exactly that, using either the Workflow execution system or the Terminal in a Cloud Environment. This has been very useful for our team, so we created a public workspace that demonstrates how you too can do this with minimal effort.
— ☁️ —
The Workflow approach uses a single-task WDL script, notebook_workflow.wdl, that we wrote to serve as a lightweight wrapper for the Papermill command. You can submit this WDL through Terra’s Workflows execution interface as usual, specifying as inputs the path to the notebook file you want to run programmatically as well as the environment container to use for testing, and any number of other relevant parameters.
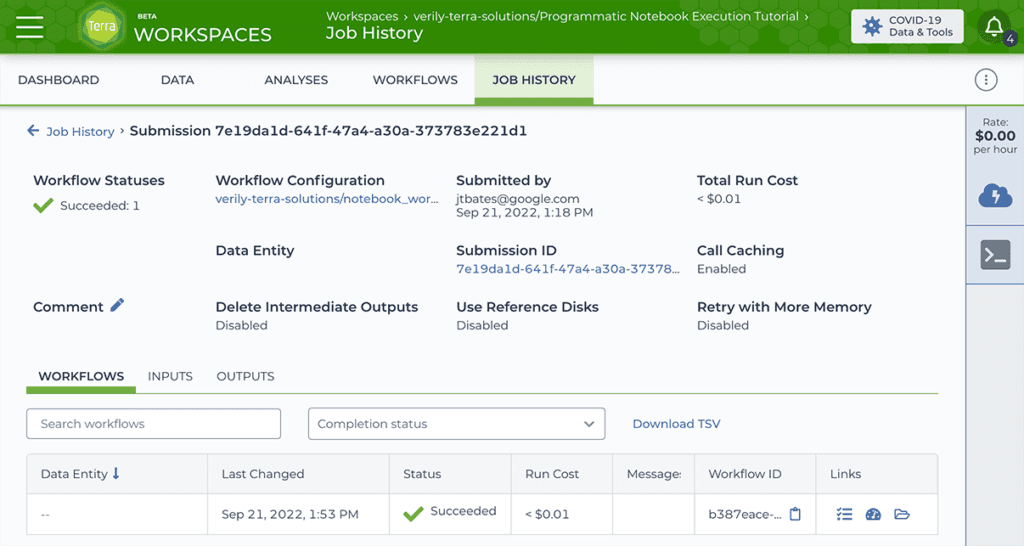

The output of this workflow is a copy of the original notebook, fully executed and rendered in html, along with any files generated by the notebook execution itself.
— ☁️ —
In contrast, the Terminal option uses dsub, a Google Cloud tool that was developed for submitting and running batch scripts in the cloud. The basic idea behind dsub is to emulate the experience of using high-performance computing job schedulers like Grid Engine and Slurm, which allow you to write a script and then submit it to a job scheduler from a shell prompt on your local machine. You can then disconnect from the shell, go about your business, then later come back and query the status of your job using a predefined command generated at submission time.
You can use this tool in Terra by launching a Jupyter Cloud Environment (Python kernel), which includes a built-in Terminal app that you can fire up by clicking on its icon in the right-hand toolbar. Once you’ve installed dsub and its dependencies into your environment, you can run dsub commands to submit jobs to Google Cloud as if it were your local compute server.
For the purpose of running notebooks programmatically, you need to run a dsub command that will in turn launch the desired Papermill command, with the appropriate inputs and environment configuration. This may sound complicated, but the actual command that you will run in the Terminal is short and straightforward: to keep things simple, we wrote a Python script called dsub_notebook.py that wraps all the functionality you need to configure, launch and monitor the Papermill job through dsub. All you need to do is adapt the command with your input notebook and any appropriate parameters, and run it in the Terminal of your Python Cloud Environment.
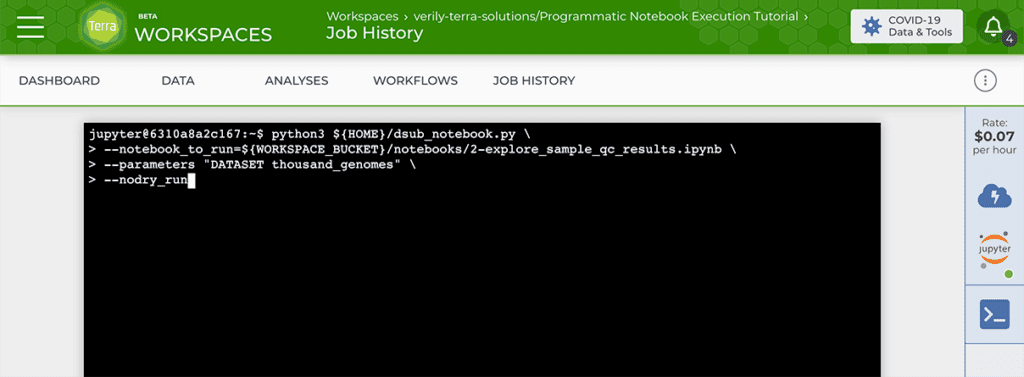

This produces the same outputs as the Workflows option: a copy of the original notebook, fully executed and rendered in html, along with any files generated by the notebook execution itself.
— ☁️ —
You can find a detailed tutorial with step by steps instructions in the public workspace that we created to demonstrate how this works in practice. The tutorial includes an example notebook parameterized with Papermill, with three choices of input datasets, as well as a setup notebook to install dsub into your environment quickly and painlessly.
We hope you will find this resource useful and would love to hear your feedback on how we could make it even better, either in the public Terra forum or privately through the helpdesk. You can also open an issue in the terra-examples repository to report a problem or discuss a technical aspect of the scripts.
Resources
- Programmatic Notebook Execution Tutorial (public Terra workspace)
- terra-examples repository (examples and utility scripts)
- Papermill documentation
- dsub documentation
